

Yep, I said it. Homemade bacon. When I said those words to my oldest child it was as if it was the best day ever. It has been a long time coming, but I finally went through and have made some of the best bacon I think I have ever had. I am honest when I say that as well. I have had good bacon, and Nueske’s is probably some of the best I have had in Wisconsin, until now. Let’s just say there is something about homemade bacon. Not only the satisfaction and almost giddiness that you get when you finally taste the bacon, but the texture is something to be reckoned with.


I do want to give credit to my colleague at work. This is one of the guys that if we are not in a meeting, or rushing off to support some technical issue, that he is the one I am talking to, or vice versa, about food, around 9:30 a.m., every morning. He was the one who was talking about charcuterie, the art of preparing meats such as bacon, pancetta, sausages, confit, and more, primarily from pork. The old school way, and now maybe the only way, to craft and preserve meat. It was he who excited me in this path and informed me to pick up the book, Charcuterie: The Craft of Salting, Smoking, and Curing.
Lets get started on this simple recipe of making homemade bacon.

Ingredients:
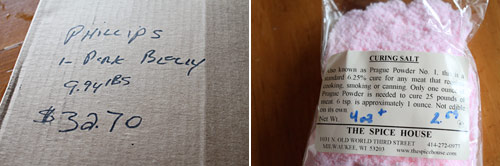
- 4 lbs of pork belly, skin on
- 1/4 cup of basic dry cure
- 1 tbsp cracked black pepper (optional)
- 1 tbsp garlic powder (optional)
- large ziplock bag or sealed plastic container large enough to hold the pork
Dry Cure:
- 1 lb of Kosher salt
- 8 oz granulated sugar
- 2 oz of pink salt, approximately 10 tsp
Please note that the dry cure makes a lot, probably enough to keep me making bacon for a year, if not more, and you only need a quarter cup of the cure.

So begin by locating a good pork belly. You might ask, ‘where am I going to find four pounds of pork belly!?’. No worries, locate a good butcher, and stick with that butcher. I have been going to Ray’s for some time now, and I knew that when I would ask if they had pork belly, in that quantity, that I would have to look no further. In all honesty, Ray’s Butcher Shoppe was more than happy to order my pork belly, roughly over nine pounds worth! That was double the bacon, and I am already planning my next savory bacon because after all, this bacon was spot on, and not it is time to experiment with flavor.
So begin by mixing your dry cure, making sure everything is thoroughly mixed.

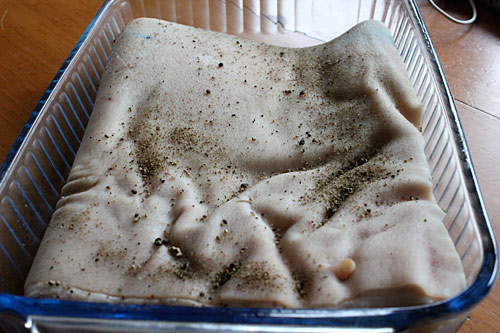
Take your pork belly and begin sprinkling the 1/4 cup of dry cure all over the belly. Top, bottom, and all sides. Make sure everything is coated, rubbing it into the pork.
Place this into a sealed plastic bag or container, placing in a refrigerator, and wait.
I say wait, but because you are looking at about 7-9 days before the next process.
About every other day, flip the bag or meat making sure to redistribute the cure liquid, a process called overhauling.
In seven days, check the pork for firmness. If it feels firm at the thickest point in the belly, it should be cured. If not, let it go another day before checking again.
Once you have reached the firmness, mine went for about 8 days, remove it from the refrigerator, and container, and rinse it under cold water.
Pat dry with paper towels, and place it back into a clean, sealed container for one more day. At this point the pork builds up a tackiness that I preferred so that I could season the outside the following day.
Now is the day we have been looking for. The day to rub and smoke and slow cook the bacon. This step takes approximately two hours to cook, another hour or so to cool down, then you can begin slicing, and cooking the way you prefer to cook your bacon.
Mix the black pepper and garlic powder. Sprinkle over all sides of the cured bacon.
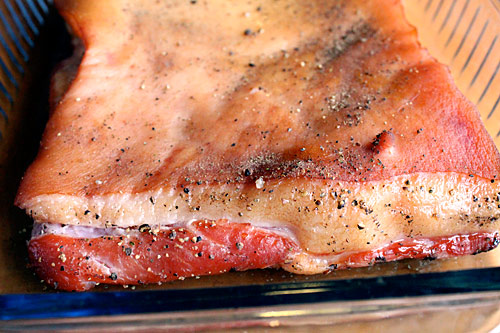
Your next choice is to place it directly in the oven, or into your smoker if you have one. I have one, so I decided to light some coals, bring it to approximately 200 degrees, and place the pork inside, covered, skin side up, for roughly one hour. About 30 minutes in, I laid in my soaked cherry woodchips onto the coals, and let it smoke for about the additional 30 minutes.
At this time, I preheated my oven to 200 degrees inside the house, and finished the cooking process there, uncovered, on a wired rack.
Once the additional hour is done, check the temperature of the meat. You are looking at 150 degrees. Once you reach that temperature, remove it from the oven, and let it cool to room temperature.
Now is the fun part. Slicing it. If you have a really sharp knife, begin slicing into your desired thickness. I have a meat slicer (which I totally love) and it worked amazingly well on the bacon. I cut my belly in half to fit on the slicer, and began making thin slices, then thick slices. I took the remaining pork and cubed it, making lardons to be used later on in soups, stews, and other recipes.

So now you are left with a lot of bacon. The best thing to do now is to save some thick, some thin, and some lardons to be used in the next several weeks. Take the remaining bacon and seal it the best you can before placing in the freezer, or package it up, and give it away.
The next and final step is to cook it. I made mine later in the night so I needed to try it out. I had the kids waiting in line for fresh cooked bacon, and let me tell you, it was worth the wait.
Remember that giddiness I was referring to? I think I was chuckling to myself while cooking the bacon. Maybe I was tired, but I do not think so. I was excited. Extremely excited that the bacon I just cooked had a texture and flavor like nothing other. It was bacon at its finest. A simple cure, a waiting game, and the ultimate pleasure of making something that almost everyone loves. My kids were even talking about it. Kids in the block came over and asked me if it was true that I made my own bacon. One just showed up this morning asking for some, and as the other kids said, “this is the best bacon I think I have ever had”. Enjoy.